
Serial debugging on the ATtiny85
2023-11-03
Background
The ATtiny85 is part of the ATtiny family of microcontrollers, originally from Atmel, now Microchip Technology. It is very small, with only eight pins, six of which are available for I/O. Despite its limitations, it's surprisingly accessible to beginners (myself included) thanks to its compatibility with the Arduino IDE.
The ATtiny85 lacks many features that make "real" Arduinos so easy to work with for hobbyists, such as a proper serial port that makes it easy to send debug messages to a computer. Since most people don't have access to specialized debugging hardware and software, many tinkerers resort to turning LEDs on and off in order to indicate various states of a program. I usually develop the code on an Arduino, where debugging is slightly more straightforward, until I'm happy with it and then transfer it to the ATtiny85. This approach works quite well up to a certain point, but sometimes you simply need to understand what's going on inside the ATtiny85 itself.
Serial communication
As mentioned, the ATtiny85 doesn't have a hardware serial port, and even if it did those pins would probably get used for other things most of the time. Luckily there are other options. For one of my hobby projects I really wanted to know what value I was receiving from an external chip, and decided to give ATtinySerialOut a go. It's a super compact "software serial" library written by Armin Joachimsmeyer specifically for ATtiny microcontrollers.
The library can be installed through the Library manager within the Arduino IDE by simply searching for its name and clicking Install.
A very basic example
Here's a short snippet to get started with ATtinySerialOut. The default output pin is PB2 on ATtiny85.
#include <ATtinySerialOut.hpp>

void setup() {
   initTXPin();
}

void loop() {
    Serial.println("Hello world!");
    delay(1000);
}
Actually, the above code didn't work for me, since the ATtiny core I'm using in the Arduino IDE doesn't define pin constants like PB2. If you run into the same problem, or want to specify a different pin, you can define the TX_PIN macro before including the library, like this:
// The pin must be defined before the library is included
#define TX_PIN 2
#include <ATtinySerialOut.hpp>

void setup() {
   initTXPin();
}

void loop() {
    Serial.println("Hello world!");
    delay(1000);
}
The library implements a whole bunch of nice methods for sending various kinds of data, very convenient.
Speed
The default baud rate of ATtinySerialOut is 115200. In order to change that, a special macro can be defined:
// The macros must be defined before the library is included
#define TINY_SERIAL_DO_NOT_USE_115200BAUD
#define TX_PIN 2
#include <ATtinySerialOut.hpp>

void setup() {
    initTXPin();
}

void loop() {
    Serial.println("Hello world!");
    delay(1000);
}
Using the above macro, the baud rate now depends on the clock frequency of the ATtiny. For 1 MHz it's 38400 and for 8/16 MHz it's 230400. You can change the clock frequency in the Tools menu of the Arduino IDE and write it to the ATtiny using the Burn bootloader option in the same menu. There are some caveats to this, for more details please see my post Setting the ATtiny85 clock speed.
Proxying
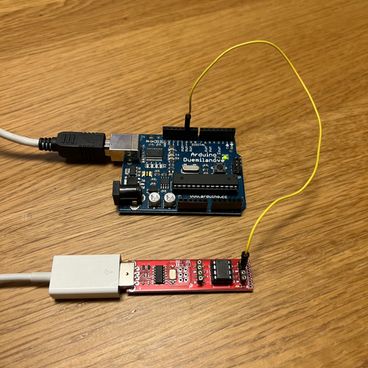
Great, we can now transmit data using just a single pin, but where to receive it? In my case, I just wanted to read the value in plain text, so I decided to receive it on a regular Arduino and re-transmit it to my laptop over USB, so that the Arduino acts like a small proxy between the ATtiny and the laptop. Using a serial to USB-adapter I guess it would be possible to receive the data right into the computer, but in my case I just wanted to get on with trying to solve the real problem I was stuck on.
Here's the code for the Arduino serial proxy using the built in SoftwareSerial library.
#include <SoftwareSerial.h>

int rxPin = 10;
int txPin = 11; // This can be any other free pin if you don't need to send data back to ATtiny

// Set up a new SoftwareSerial port
SoftwareSerial softSerial(rxPin, txPin);

void setup() {
    // This is the serial interface between the Arduino and the laptop
    Serial.begin(57600);
    Serial.println("Ready");

    // This is the serial interface between the Arduino and the ATtiny
    softSerial.begin(38400);
}

void loop() {
  if (softSerial.available() > 0) {
    char received = softSerial.read();
    Serial.print(received);
  }
}
As you can see I've set the SoftwareSerial port to 38000 bps, which was needed in order to achieve reliable data transfer. Remember that whatever is receivng the transmission must share ground with the transmitting ATtiny
Summary
If you just want to get this all working, here's what you have to do:
- Install the ATtinySerialOut library from within the Arduino IDE.
- Set the clock frequency of your ATtiny to 1 MHz.
- Flash the following code snippet to your ATtiny:
#define TINY_SERIAL_DO_NOT_USE_115200BAUD
#define TX_PIN 2
#include <ATtinySerialOut.hpp>

void setup() {
    initTXPin();
}

void loop() {
    Serial.println("Hello world!");
    delay(1000);
}- Flash the simple proxy code above to your Arduino.
- Connect your Arduino to your laptop and power up your ATtiny.
- Once they're both running, connect pin 2 from the ATtiny to pin 10 on the Arduino, and make sure the two circuits share a common ground.
- Open the Serial monitor in the Arduino IDE and watch the messages come rolling in.
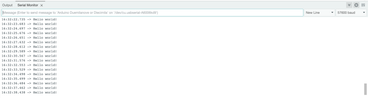
Happy tinkering!